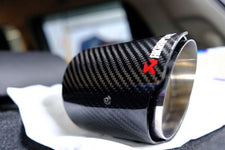

How Far Should Exhaust Tips Stick Out?
A good exhaust tip should not look like an afterthought. If it sits too far inside the bumper, the upgrade almost disappears. If it sticks out too much, the rear can look cheap, unbalanced, or incorrectly installed.
So how far should exhaust tips stick out?
There is no single number for every car. The right position depends on the bumper shape, diffuser depth, outlet style, pipe angle, and the visual style you want. But there is one practical rule: the tip should look centered, clear the bumper safely, and follow the rear design of the car.
You can compare different outlet styles through Kipalm Single Tips
(https://www.kipalm.com/collections/carbon-fiber-single-tips)
and Kipalm Dual-tips
(https://www.kipalm.com/collections/carbon-fiber-dual-tips).
Why Exhaust Tip Position Matters
Exhaust tip position affects more than appearance. It also affects clearance and installation quality.
If the tip is too short, exhaust stains may collect near the bumper opening. The rear upgrade may also look unfinished because the outlet hides under the diffuser.
If the tip is too long, it may look awkward from the side. It may also become easier to bump, scrape, or damage during parking, washing, or loading.
A clean installation should look natural from three angles:
- Straight rear view
- Side view
- Low angle near the bumper
If it only looks good from one angle, the position may need adjustment.
A Practical Positioning Rule
For most decorative exhaust tip upgrades, the outer edge of the tip should sit close to the bumper line or slightly beyond it. It should not be deeply hidden, and it should not extend so far that it becomes the first thing you notice from the side.
The best position usually feels like this:
- Visible from the rear
- Slightly proud of the bumper edge
- Even on both sides
- Not touching plastic trim
- Not pointing downward awkwardly
- Not sticking out like an unsupported pipe
On sportier builds, a slightly more visible tip can work. On luxury or clean OEM-style builds, a more flush position often looks better.
Check the Side View First
Many buyers only check the rear view. That is a mistake.
The side view tells you whether the exhaust tip length is reasonable. A tip may look perfect from behind but stick out too much when viewed from the side.
Before tightening the clamp or welding the tip, step back and look from both rear corners. Check whether the tip follows the bumper line. For a left-right pair, both sides should extend the same distance.
If the tip is angled or staggered, symmetry becomes even more important.
Leave Bumper Clearance
Exhaust systems vibrate. The engine moves, road conditions change, and heat expansion can slightly change the position. A tip that looks barely clear when parked may touch the bumper during driving.
Leave enough space around:
- Top edge
- Side edges
- Lower diffuser area
- Inner wall near the pipe
- Carbon fiber outer shell
This is especially important for carbon fiber exhaust tips. The carbon shell should not rub against plastic or painted trim.
If your bumper opening is tight, choose a smaller outlet or an adjustable design instead of forcing a larger tip.
Outlet Shape Changes the Visual Position
Different tip shapes create different visual effects.
| Tip Shape | Positioning Note |
|---|---|
| Round | Easy to center and adjust |
| Oval | Needs horizontal alignment |
| Square | Must match bumper cutout closely |
| Dual outlet | Needs width and side clearance |
| Quad style | Requires careful left-right symmetry |
| Angled tip | Side view is very important |
Round tips are forgiving. Square and oval tips are less forgiving because even a small tilt can look obvious.
For more flexible alignment, check Kipalm Adjustable Tips
(https://www.kipalm.com/collections/adjustable-tips).
Short Tip vs Long Tip
A short tip is easier to hide and may suit subtle builds. But if it sits too deep, the upgrade loses visual impact.
A long tip gives more presence, especially on sport sedans and SUVs. But if it extends too far, it may look like the wrong size.
When comparing products, do not only check inlet and outlet size. Check total length too. A correct inlet with the wrong length can still install poorly.
Before buying, measure:
- Pipe end to bumper edge
- Available clamping length
- Bumper cutout depth
- Desired visible length
- Left-right distance if installing a pair
Common Installation Mistakes
The most common position mistakes are simple:
- Tightening the clamp before checking both sides
- Choosing a tip based only on outlet diameter
- Ignoring total length
- Forgetting bumper heat clearance
- Installing one side deeper than the other
- Using a large dual tip in a narrow bumper opening
- Not checking the side view
Take a few minutes to dry-fit the tip first. Mark the position lightly if needed. Once the angle and depth look right, then tighten or ask the installer to fix it.
Final Advice
Exhaust tips should stick out enough to be seen, but not so much that they look forced. The right position should match the bumper line, leave safe clearance, and look balanced from the rear and side.
If you are unsure, send rear and side photos to Kipalm Contact Us
(https://www.kipalm.com/pages/contact-us).
A quick fitment check is easier than fixing an exhaust tip that sits too deep, too far out, or unevenly.
FAQ
Q1: Should exhaust tips be flush with the bumper?
They can be close to flush or slightly extended. The best position depends on the bumper shape and car style.
Q2: Is it bad if exhaust tips stick out too far?
It may not look natural and can increase the chance of bumps, scraping, or visual imbalance.
Q3: Can carbon fiber exhaust tips touch the bumper?
No. Leave clearance around the carbon shell to avoid rubbing, heat marks, or vibration damage.
Q4: Do dual exhaust tips need more space?
Yes. Dual tips need enough horizontal width and side clearance.
Q5: Can adjustable tips help with position?
Yes. Adjustable tips can help correct angle and final alignment on some vehicles.